
How to Make and Prepare Kava: From Elaborate Rituals to Simple Pleasures

Kava, a staple in Pacific Island traditions, has been a centrepiece in communal gatherings and ceremonies for generations. When preparing kava from powder, you can embrace these age-old rituals or opt for quicker, modern methods.
This guide walks you through both, allowing you to decide how you'd like to enjoy your kava experience.
How to Prepare Kava Using the Traditional Method
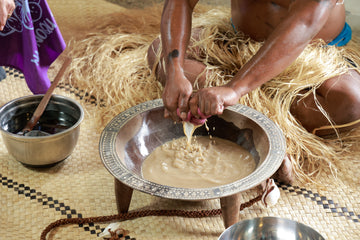
Traditionally, kava has played a central role in Pacific Island community rituals, where it has helped forge social bonds and deepen connections, enhancing its euphoric effects. The tactile and sensory involvement in its preparation—a mindful process engaging both touch and taste—not only honours its rich history but also augments the pleasurable effects of the drink.
Whether you find yourself sharing kava in a group or savouring it alone, embracing the traditional method allows you to experience a deeper connection, enhancing not only the flavour but the overall experience.
Ingredients
-
FijiKava Noble Kava Traditional Grind. Half a cup (approximately 10 servings)
- Cold water. 2 litres (or less if you want to make strong kava)
Tools:
-
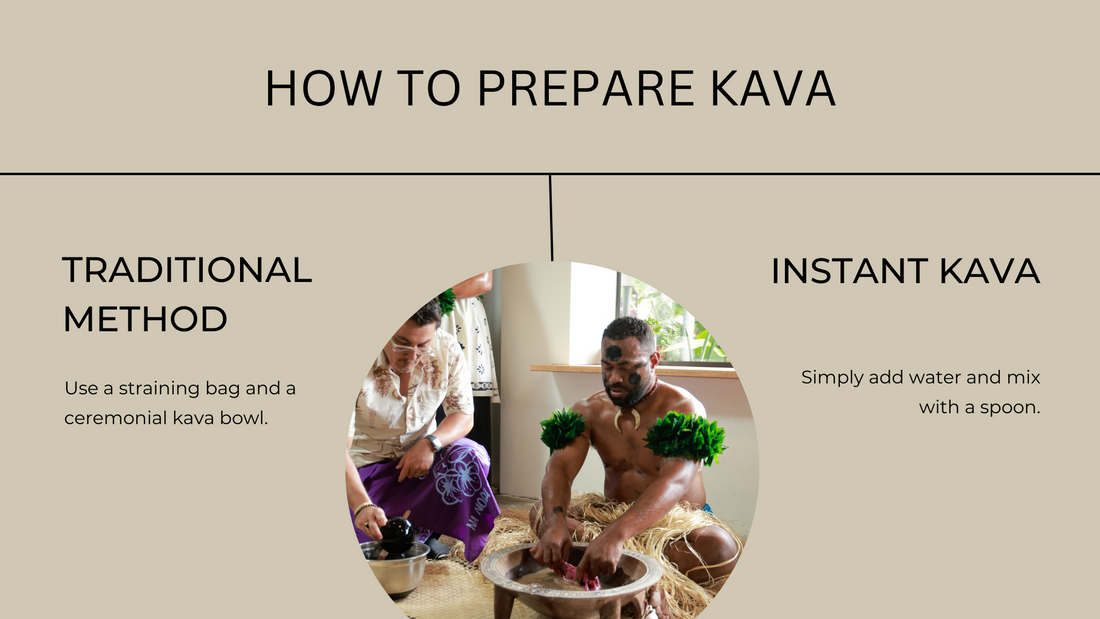
A straining bag or a fine mesh sieve. This is to strain out the course particles, leaving only the a smooth liquid containing all the active kava constituents. You can also use a large cheesecloth or even an unused sock or nylon stocking!
- A tanoa or ceremonial kava bowl. Ideal for keeping the tradition and enhancing the communal aspect of kava preparation. If unavailable, any large bowl will do.
The Process
-
Begin by placing the kava powder inside the strainer bag. Your kava journey begins!
-
Place the filled strainer bag in an empty bowl and slowly pour cold water over the kava in the bag, ensuring the powder remains inside the strainer. This step is more than just a functional process; it's a chance to start engaging with the kava on a sensory level, as the distinct, earthy aroma begins to fill the space.
-
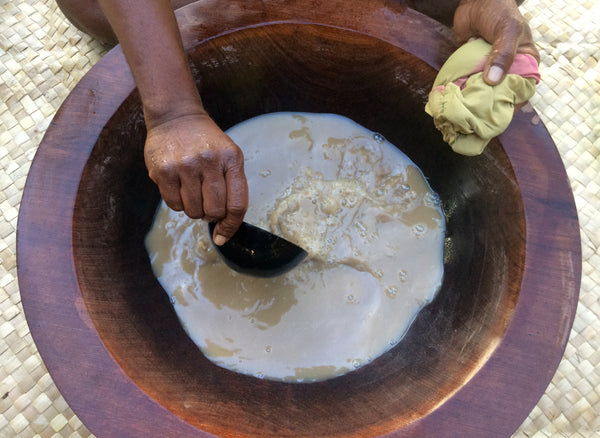
Next, twist the top of the strainer bag to remove any excess air and start kneading the wet kava in the bag while it’s submerged in the water. Here, you become a more integral part of the process, finding a rhythm in the kneading that might offer a moment of mindfulness amidst the manual work.
-
Continue kneading the kava, noticing the water changing to a darker brown and feeling a bit oily - signs that the kavalactones are being released into the liquid. Keep a check on the time, kneading for no more than ten minutes to ensure you're extracting the right amount of potency without damaging the strainer bag.
-
Once done, squeeze the bag firmly to separate the liquid from the root particles, bringing you a step closer to enjoying a beverage steeped in cultural heritage.
-
(Optional) If you want, you can add some fresh cold water to the bowl for a ‘second wash’ using the same bag of kava. This step yields a weaker batch, providing a chance for a slightly extended, yet lighter kava experience.
How to Enjoy Your Traditionally Prepared Kava
As you pour yourself a serving, pause to enjoy the earthy aroma. The first sip brings a unique taste and a hint of numbness on your tongue, a telltale sign of authentic kava.
If you're with friends, this can be a simple yet bonding ritual, a time to unwind and share stories, enhancing the pleasant effects of the kava.
If alone, create a calm space to sit and savor your drink, perhaps coupled with a few moments of reflection, turning your kava session into a peaceful respite from the day’s stressors.
For any leftover kava, store it in the fridge for up to a week, and remember to keep an eye on servings to fully enjoy the kava experience responsibly.
How to Prepare Kava Using Easy Blender Method (Using Traditional Grinds)
The blender method is a quick and efficient way to prepare kava, still using traditional grinds to maintain a semblance of the authentic experience rooted in Pacific Islander traditions.
Whether enjoyed with friends or savoured during a quiet moment alone, this method makes it easy to incorporate the soothing effects of kava into your daily routine.
Ingredients
-
FijiKava Noble Kava Traditional Grind. Half a cup (approximately 10 servings)
-
Cold water. 2 litres (or less if you want to make strong kava)
-
Coconut oil (optional). 1 teaspoon, to enhance kavalactone extraction
- Lecithin (optional). a small amount to assist in extracting fat-soluble kavalactones
Tools
-
Blender. Necessary for finely blending the kava powder with water, fostering efficient kavalactone extraction.
-
Strainer Bag or Fine Mesh Sieve. To separate the smooth liquid from the coarse kava particles.
-
A Clean Bowl. To receive the strained kava mixture. You may even want to use a ceremonial kava bowl called a tanoa.
The Process
-
Measure the kava powder and place it into your blender, along with the water.
-
(Optional) Add a teaspoon of coconut oil or a bit of lecithin to the mixture, aiding in kavalactone extraction.
-
Blend the mixture on high for 3-4 minutes until it's fully blended.
- Using a strainer bag or a fine mesh sieve, strain the blended mixture into a clean bowl, leaving behind a smooth liquid ready for consumption.
How to Enjoy Your Blended Kava
Pour a serving and get ready to unwind. Though the taste can be strong, following it up with a chaser like a piece of fresh fruit or a sip of coconut milk can make it more enjoyable.
Ideally, enjoy it on an empty stomach and give yourself breaks between servings to fully experience the effects of the kavalactones. Remember to store any leftover kava in the fridge and consume it within a week.
The Easiest Method: How to Prepare Micronised Kava

When life gets hectic, having a straightforward method to prepare kava tea can be a lifesaver Micronised kava provides the answer, offering a quicker and less laborious method for brewing a cup of kava tea without sacrificing its authentic taste and effects.
Here's a step-by-step guide on how to make kava without a strainer as a single serving, making it a breeze to prepare a fresh cup whenever the mood strikes.
Ingredients
-
FijiKava Instant Kava. 1-2 teaspoons (adjust according to your preference)
- Cold water. 200-250mL
Tools
-
A bowl or a large mug. Ideal for mixing and enjoying your kava with ease.
- A spoon. To mix the kava in water for even distribution.
The Process
-
Begin by placing 1-2 teaspoons of micronised kava into your chosen vessel, be it a bowl or a large mug. Unlike the traditional grind, micronised kava is finely processed to remove hard fibrous material, making it entirely harmless and easy-to-digest.
-
Next, add cold water to the kava. The ratio can be adjusted according to your preference, but a general guideline is 200-250mL of water for every 1-2 teaspoons of kava.
-
Stir the mixture vigorously until the kava is evenly distributed in the water. You'll notice small particles in the mixture; however, they are entirely harmless and easy-to-digest.
- Your kava tea is now ready to be enjoyed. Due to its finer texture, micronised kava allows for a smoother beverage, offering a pleasant and quick preparation experience.
How to Enjoy Your Micronised Kava
Pour and savour your kava tea, appreciating the simplicity of this preparation method. The ease of this process means you can enjoy a cup of kava tea at any time, embracing its calming effects whenever you wish. Remember, the fine particles present are entirely harmless and easy-to-digest, ensuring a comforting and delightful experience each time.
How to Make Kava Taste Better
While the authentic taste of kava is indeed an acquired preference, often described as earthy or even a bit peppery, newcomers might find it a bit strong to their liking. Fret not, as there are several ways to make your kava taste between, allowing you to enjoy your kava experience on your own terms.
Here's how you can modify the flavour profile to suit your palate:
-
Add Sweeteners: Incorporate a hint of sweetness to your kava by adding natural sweeteners like honey, stevia, or agave syrup. A little sweetness can go a long way in balancing the earthy notes of kava.
-
Use Flavourful Chasers: After a sip of kava, try following it up with a chaser that complements its flavour. Popular choices are fresh fruits like pineapple, apple, or a slice of lemon. You can also use a sip of coconut milk to cleanse the palate.
-
Infuse with Spices or Herbs: Experiment by adding spices such as cinnamon or nutmeg to your kava. A fresh mint or lemongrass infusion can also introduce a refreshing note to the drink.
-
Cold Beverages: Serving kava chilled can somewhat mellow its strong flavour. Try refrigerating your kava before serving or even blending it with ice for a refreshing kava slushie.
-
Mix with Other Beverages: To create a different flavour profile, consider mixing kava with other beverages like tea or juice. For instance, a blend of kava with chamomile tea can offer a relaxed, soothing flavour combination.
- Creamy Additions: Incorporate creamy elements like coconut cream or almond milk to your kava. This not only enriches the texture but also softens the robust earthy notes, giving it a smoother taste.
Remember, making kava taste better is a matter of personal preference, and it can be a fun, experimental journey to find your perfect blend. With time, you might even grow to appreciate the traditional taste of kava, embracing it as a part of the enriching, calming experience it offers.
Conclusion
In this guide, we've covered various methods to prepare kava, from the traditional approach to a quick kava tea. Whether you're gathering with friends or enjoying a solitary moment of relaxation, making a kava drink can be as simple or as involved as you want it to be. We hope this guide helps you find your perfect balance, merging the rich tradition of kava with your contemporary lifestyle.